Showing posts with label Android Tips. Show all posts

Monday, May 8, 2017

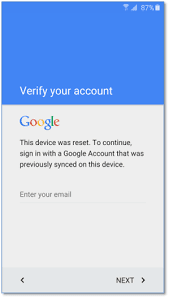
How To Remove / Bypass Google Account (FRP) On Lenovo Phones Qualcomm Base

I WILL SHARE YOU HOW TO REMOVE / Bypass Google Account (FRP) ON LENOVO USING FASTBOOT
Its Very easy to remove FRP (Google Verification Lock) on Lenovo Devices Using miracle box, But for those using miracle crack Follow this easy step below.


This Method didn't require any Lenovo Firmware or Stock Rom,didn't require any Lenovo Tool or Flashing Box 
Just follow the method below.
How To Remove / Bypass Google Account (FRP) On Lenovo Phonez Qualcomm Base 
Powered off the phone an boot into recovery
Scrow down to reboot bootloader
Lenovo will reboot to fastboot mode 
Open command prompt
an type the following:

fastboot devices this will show that your device is connected 
fastbot erase userdata
fastboot erase cache
fastboot erase config
fastboot reboot

WHAT IS FRP {factory Reset rotection} ?.Factory Reset Protection (FRP) is a security method that was designed to make sure someone can't just wipe and factory reset your phone if you've lost it or it was stolen. Starting with Android Lollipop, FRP is "standard" in vanilla Android, and most companies making our phones have implemented it in their own models. It's a good thing — it makes a stolen phone harder to use, which makes it less appealing to thieves, and anything that can protect our data on a phone we've lost is welcome.
The problem is that people are selling or trading or even giving away phones with FRP enabled and this makes things difficult for the next user.
How it works explains why. If you reset a phone with FRP enabled, you have to provide the user name and password for the last Google account that was registered with the device. There are random work-arounds on the Internet, but they tend to get patched almost as soon as they are discovered. You'll pretty much need to know the login details for the last account to use the phone before you can do anything with it if FRP was enabled before you reset it.

Download Samsung FRP Helper

Samsung FRP helper v0.2

Have a look what this tool can do.
Bypass almost every FRP protection by ADB. (Need combination firmware).
This tool has 2 methods to bypass FRP (a) Calling Method (Real Term Method) and (b) ADB Method.
The Tool is Easy to use. User friendly GUI.
Auto detect ADB device when phone connected to PC.
It can read phone info (Not fully, My focus on removing FRP)


How to use Samsung FRP Helper (ADB Mode)?Download a combination firmware for your phone.
Flash it through Odin.
Turn on mobile and connect to PC.
Click on ADB Method tab.
Click on Remove FRP button and FRP should gone.

How to use Samsung FRP Helper (ADB Mode)? optionalI know everyone know the method of Real Term. If you wan't to learn this method just Google it. You will find great things.
Download Samsung FRP Helper

RealTerm Serial TCP Terminal V3.0.0.29 Latest Version - 2017 FRP Tool


RealTerm Serial TCP Terminal V3.0.0.29 Latest Version with link to Download

What is RealTerm ?
Realterm is an engineers terminal program specially designed for capturing, controlling and debugging binary and other difficult data streams. It is the best tool for debugging comms.


What is FRP?
Factory Reset Protection (FRP) is a security method that was designed to make sure someone can't just wipe and factory reset your phone if you've lost it or it was stolen. Starting with Android Lollipop, FRP is "standard" in vanilla Android, and most companies making our phones have implemented it in their own models.


RealTerm Serial TCP Terminal V3.0.0.29 Latest Version

Download Samsung 2016 FRP Helper with MM Unlocker Box Samsung

Samsung 2016 FRP Helper with MM Unlocker Box Samsung
Samsung 2016 FRP Tool


What is FRP?
Factory Reset Protection (FRP) is a security method that was designed to make sure someone can't just wipe and factory reset your phone if you've lost it or it was stolen. Starting with Android Lollipop, FRP is "standard" in vanilla Android, and most companies making our phones have implemented it in their own models.

Samsung 2016 FRP Helper Functions:Make Call 111 - Make Security Easy - Remove Factory Mode - Factory Reset - Download Mode...

MM Unlocker Box Samsung Functions:

Remove All Lock Version 2.x.x 4.x.x

Download - FRP Remover - SideSync - FRP APKS - Clear/Reset
Xiaomi Unlock - Meizu Unlock - Others Unlock


Samsung 2016 FRP Helper with MM Unlocker Box Samsung

How To Bypass Unfortunately the FRP Bypass has stopped

Many people has been facing ERROR in “Type Email and Password” on Google Account Manager on the process of bypassing Google Verification (FRP) 
So, i decided to make this Tutorial “How to Bypass Error of Google Account Manager” Unfortunately the FRP Bypass has stopped in “Type Email and Password” for all New devices having (Android 5.1.1 to 6.0.1). 


If you can’t see “Type Email and Password” in your Google Account Manager, like if you see “Error” instead of Type email and password. Then Follow these steps to remove this Error from your device.

This method was tested on so many Device Running Android 5.1.1 and 6.0.1 Also on Samsung Devices such As Galaxy S7 G930, S7 edge G935, Note 7 (2016) SM-N930A but should work also on Note 4 N910F, Note5 N920V, Note7 N930V, Samsung Galaxy J3 (2016) J320F, Grand Prime SM-G531H, A310M, A510F, A710M (2016). J120F, J200F, J500F/H, J700F/H, E500F, E700F and , and all other Samsung Models whether its 2015 or 2016.
Follow this Guide On HOw to Bypass ERROR in “Type Email and Password” on Google Account Manager or Unfortunately the FRP Bypass has stopped
To Bypass Error in Google Account Manager “Type Email and Password” or Unfortunately the FRP Bypass has stopped on New Devices:


From “Google Account Manager” screen, “Go back <“ and on the Address Bar of Google Chrome, Type : Google.com after that Search for “Google Account Manager” on the Google search bar. And click on the link starts with : apkmirror.com>apk>google.inc.


In the apkmirror site scroll down to have a list of all “Google Account Manager” versions. Download Google Account Manager 6.0.1” For Android 6.0.1 Marshmallow. for Android 5.1.1 Lollipop, will not support this apk so download Google Account Manager with “5.1-1743759” for Android 5.1.1 Lollipop Users.

At Google Account Manager screen Scroll Down and tap on “Download APK” your download will start in a few seconds. Click OK if see you any Pop-up window, then the downloading will be started.


Once download completed, Open the GoogleAccountManager.apk and Tap on “Settings” and Scroll down to enable the “Unoown Sources”. After it just tap on “INSTALL” to install the apk.

Tap on “Done” once the apk installed. “Go back <” and on the Address Bar of Chrome Type : Google.com and search for “Quick Shortcut Maker” on the search bar and go to this link.

Click on “Download APK from APK20” and tap “OK” if you see any Pop-up window and tap on “Replace” if you have already downloaded the apk before, Then Open the apk and tap on “Settings” when it shows “Installed blocked” window. Scroll down and enable the “Unknown Sources” and tap “OK”.
Install the application, Once it installed tap on “OPEN” and search for “Google Account Manager” on the search bar of Quick Shortcut Maker application. And then you will see “Type Email and Password” is available now.
Tap on “Type Email and Password” and tap on “/Try” and tap on “:” three points on the top right corner of your Samsung Phone Screen.
Then select “Browsers Sign-In” and “OK”. Now you will see “Google Sign-In” screen with a message “Sign in with your Google Account”
So, now you can enter your own Google Account, Just enter your Gmail ID and Password. If you don’t have Gmail ID or Google Account Password, Tap on “Create Account” to create one and then Sign-In with it.
You’ll be redirected to the “Google Account Manager” after Signing-In to your Google Account. Now on this screen Press “Power Button” and Select “RESTART” and wait a few seconds until your Phone Restarted.
Well, now you can do Initial Setup of your Samsung Phone and there will be no Google Account Locked Screen or FRP Lock any more.After all this done, Go to “Settings” of your Phone and go to “Back up and Reset” > “Factory Data Reset” and tap on “ERASE EVERYTHING” and wait until your phone restarts.

Feel free to ask me in the comment if you need any further help regarding this.

Download HUAWEI FRP REMOVER

THIS TOOL ALLOW YOU TO BYPASS GOOGLE VERIFICATION (FRP) ON HUAWEI PHONEs


WHAT IS FRP ?

Factory Reset Protection (FRP) is a security method that was designed to make sure someone can't just wipe and factory reset your phone if you've lost it or it was stolen. Starting with Android Lollipop, FRP is "standard" in vanilla Android, and most companies making our phones have implemented it in their own models. It's a good thing — it makes a stolen phone harder to use, which makes it less appealing to thieves, and anything that can protect our data on a phone we've lost is welcome.
The problem is that people are selling or trading or even giving away phones with FRP enabled and this makes things difficult for the next user.
How it works explains why. If you reset a phone with FRP enabled, you have to provide the user name and password for the last Google account that was registered with the device. There are random work-arounds on the Internet, but they tend to get patched almost as soon as they are discovered. You'll pretty much need to know the login details for the last account to use the phone before you can do anything with it if FRP was enabled before you reset it.

WHAT IS THE USEFUL OF THIS TOOL?

This tool Allow you to remove/bypass frp lock on Huawei device in fastboot mode.

HOW CAN I USE THIS TOOL TO BYPASS / REMOVE FRP ON HUAWEI ?
Fist: Download this Tool below


HUAWEI FASTBOOT FRP REMOVER 


Put the device (Huawei Phone) to fastboot mode using vol down
optional: if vol keys dont End you to fastboot, boot phone to recovey mode, inside recovery scroll to the option "reboot bootloader". You have successful boot the phone to fastboot

Now open the Tool downloaded above, it will display device conected, click on Erase Frp

Done, you have successful remove huawei frp using fastboot mode.

reboot the phone an Setup new User

How to flash Xiaomi devices with MI Flash Tool

If you have fully bricked or soft bricked Xiaomi device, you will need to use fastboot to flash the device. Most people don’t really know how to use windows command console and enter fastboot commands to flash these devices so it’s a good thing Xiaomi created the MI flash tool which is easy to use to flash or upgrade Xiaomi devices when they are in fastboot mode. 

MI Flash Tool v20160830 SIZE: 30MB DOWNLOAD
The installer is small, light and easy to use. The following below shows how to use MI Flash Tool


NOTE:
Battery of device should be about 15%
Backup your personal files (contacts, pictures, videos etc) using Moborobo, Mobile Go etc
Do this at your own risk!


If you are upgrading your device with this tool it is good to create a local backup of your device.

Go to backup Settings > Additional Settings > Backup & Reset > Local Backup > Backup
When the backup is done, it will be stored inside internal storage > MIUI > Backup > All backup
Copy out this backup file to your PC. You might need it if you like to downgrade.


Download and install the latest version of MI Flash Tool (This installer will install all the drivers needed for flashing any Xiaomi device)
Download the fastboot ROM of your device (If the extension of the ROM is .gz, rename it to .tgz)
Extract the file to an easy location on your PC using Winrar.
Once extracted you will see a folder containing all the files needed for the flashing process.


Put device into fastboot mode by holding volume down + Power button.
When its in fastboot mode, connect to PC with USB
Launch MI Flash Tool
Click Select button
Navigate and select the folder containing the ROM of the device you want to flash then click OK
A pop up will appear, click Browse button on Fastboot Script line
Again, navigate to the ROM folder and select Flash_all.bat then click OK.


Now click Refresh button on MI Flash Tool so as to detect device connected.
At the bottom of the flash tool select the option that you want to perform after the flash or upgrade process is complete
- *Clean all wipes all data in the phone after flash (recommended)
- *Save user data keeps the current user data on the device after flash
When you have selected the option, click the Flash button for the process to begin
When you see “The operation completed successfully”. (0x00000000) know that the process is complete


Device will reboot. Note that first boot after this process longer than usual.

HOW TO REMOVE FRP ON TECNO PHANTOM 6 PLUS

This will allow you to bypass frp lock (Google Verification) on Tecno Phatom 6 Plus. 
HOW TO REMOVE / BYPASS FRP ON TECNO PHANTOM 6 PLUS

What Needed:
Internet Access 
buy phone or Wifi from here
QuickShortcutMaker  here
Google Account Manager 6.0 here
Micro SDcard
HOW TO REMOVE / BYPASS FRP Google Verification Lock ON TECNO PHANTOM 6 PLUS.
1st. Create a folder inside sdcard an name it 9jaROM, copy both (Google Accoutn Manager 6.0 & QuickshortcutMaker) You downloaded above inside the folder 9jaROM an insert into the Tecno phatom 6 Plus.
Connect the lock phone with wifi.
When connected click on Add network , when the keypad pop see screenshot below , click on Emoji.
Click on HOT @ this point switchoff your data connection or your wifi immediately you click on HOT ( you can also switch it off before click on HOT )

Now you will Encounter an Error message Try Again in Emoji, that mean you dont have working internet connection, that is the message 
under try Again, press an hold any TEXT an click on Share.


@this point choose Xender an navigate to file / sdcard /9jaROM/ 
install the two files you have copied to the folder. 1st install GoogleAccountManager.apk and tap on “Settings” when it shows “Installed blocked” window. Scroll down and enable the “Unknown Sources” and tap “OK” to install the apk.


Once it installed tap on “OPEN” and search for “Google Account Manager” on the search bar of Quick Shortcut Maker application. And then you will see “Type Email and Password” is available now, Tap on “Type Email and Password” and tap on “/Try” and tap on “:” three points on the top right corner of yourTecno Phantom 6 Plus Screen, Then select “Browsers Sign-In” and “OK”. Now you will see “Google Sign-In” screen with a message “Sign in with your Google Account”.So, now you can enter your own Google Account, Just enter your Gmail ID and Password. If you don’t have Gmail ID or Google Account Password, Tap on “Create Account” to create one and then Sign-In with it.
You’ll be redirected to the “Google Account Manager” after Signing-In to your Google Account. Now on this screen Press “Power Button” and Select “RESTART” and wait a few seconds until your Phone Restarted.
Now you can do Initial Setup of your Tecno Phatom 6 plus and there will be no Google Account Locked / FRP Lock any more.
After all this done, Go to “Settings” of your Phone and go to “Back up and Reset” > “Factory Data Reset” and tap on “ERASE EVERYTHING” and wait until your phone restarts.
Congratulation You have successfully bypass Google verification on Tecno Phatom 6 Plus.

A9-H971A1-M-160908V640

Friday, October 7, 2016

How To Unzip Or Extract Files On Your Andriod Phone Using Easy Unrar

Do you have a RAR file and you want to unrar it to view the main contents and you have just android device. Don't worry, Easy Unrar is a free android app which lets you extract,archive or compress any files present on your Smartphone. Extracting files from a zipped file is very easy on PC as each and every OS provides us inbuilt extracting software on PC. However in case of  phone, there is no such inbuilt app.


According to PlayStore, Easy Unrar, Unzip & Zip allows you to extract rar and zip files easily. It has a browser to view files on your phone or your tablet.
Supporting all versions of rar files, archives protected by a password and multi-part archives. Get simple zip compression, multi-part compression and AES encryption. Easy Unrar & Zip
enables archived content display without decompression. Save time
by selecting files and extracting them. Then open the files directly in Easy Unrar & Zip. Whole movies can be extracted and opened in a matter of minutes.


This app allows you to extract rar as well as zip files in the fraction of seconds. This app also lets you extract a movie or compress it within few minutes.

Different Functions and their Uses:

1. Extract : This option is used to extract any rar or zip files present
on your Smartphones. This is an extremely useful tool for those who want to see movies or videos with subtitles but don’t find any substitute on how to extract the downloaded subtitles.

Read Also :
Learn How to add subtitle to a particular  movie or play
◾ How to extract Ppsspp game file that comes with file extention Winrar Archive

2. Archive : When you were trying to create a new zip folder, it would ask you to save in following way. It will ask you to fill the following information. You can write a name in the place of archive name which could be lately opened usingarchive option.

3. Compress : This option lets you compress any files, movies, songs and even apk files on your Smartphone at one place. This is a powerful tool if you are trying to send more than one files to
a friend simultaneously. You can select different files and compress them into a single folder and send it to your friend. This is that easy and simple. NOTE : The main purpose of compressing a particular file is to reduce the size of the file.

How To Unzip Or Extract Files On Your Andriod Phone Using Easy Unrar 

To unzip a file using your Android phone, you will have to Download and install Easy Unrar.apk - Download it HERE and HERE(Easy unrar: + Unzip)

◾Locate the RAR file you want to Unrar and click it. Choose Easy unrar and easy unrar will be launched automatically and get ready to unrar your RAR file.
◾Tick the box in front of the file you want to unzip.
◾Click Extract All Here (you will see it at the top of the app)
◾You will see the extraction in progress as shown below,just allow it
to complete.
◾When it reaches 100% it will show Finish.

That's All. Back it and check your file wow so easy isn't it? share your opinion below.

Wednesday, October 5, 2016

See Full List Of Motorola Android Phones That Will Get Android 7.0 Nougat 7.0 Update

This post is sourced from Motorola official blog. You can get the actual poat HERE. Recently the latest Android 7.0 Nougat update is hitting many Motorola smartphones soon after approval of Android 7.0 availability for few of its devices a month ago. The company which was recently acquired by Lenovo released the full list of devices that the update will be rolled out to in a blog post so you can check if your device is among them below.


Here’s the full list of our smartphones that will be getting Nougat:

Moto G (4th Gen)
Moto G Plus (4th Gen)
Moto G Play (4th Gen)
Moto X Pure Edition (3rd Gen)
Moto X Style
Moto X Play
Moto X Force
Droid Turbo 2
Droid Maxx 2
Moto Z
Moto Z Droid
Moto Z Force Droid
Moto Z Play
Moto Z Play Droid
Nexus 6

As always, you can visit the Moto software upgrades page here for more further details on specifics by country or carrier.

Sunday, September 18, 2016

Solution To Disabled Android Phone "Unknown Sources" Widget That Hinders Installation Of App And Games

Disabled Android "Unknown Sources" is a widget in all Android smartphone that blocks installation of app. That is, if this widget is disabled, you will not be able to install any applications no matter what.

This problem occurs when you get a new smartphone but whe you notice this, you will feel your android smartphone is fake. No! It not fake it helps also in some situations that is why the widget is added in your android smartphones.

How Does This Start Or Begin ? 

This situation Starts when you get a new android smartphone and you want to install an app. If this widget is disabled(Unknown Sources). While clicking the App you want to install it will bring a note like below:
For security, your phone is set to block installation of app obtained from unknown sources. 


Don't Panic when you see this all you need to do ia just follow below method to unblock your app installation.

How To Unblock Your App Installation When Above Situation Occurs. 

To unblock your app installation when above situations comes up or occurs, immediately it bring below note, click "Settings".


Immediately your android device will scroll down automatically to where you will enable the "Unknown Sources"

When your android takes you there, check out the provided little box  in front of the android widget that says "Unknown Sources".


Tick it. Then it will bring an info like below so you click OK


Now Your "Unknown Sources" Widget has being "Enabled" Then you are good to go.


That's  all. Then go back and watch your app installing


Monday, August 29, 2016

Method To Fix PC Not Detecting Android Phone Through USB connection

Each time you connect an or your Android phone to a or your PC (both Internal and SD card) are meant to be detected together. But there are some particular cases where you connect Android phone to PC and you hear a USB connection sound and yet nothing is detected or displayed on the screen, this also happen to me when i connect
Android phone to a PC for the first time even when the Android phone has been connected to the PC before, yet I still get this issue.


Checking under Device Manager and noticed that MTP had a warning icon (yellow triangle) on it meaning it had somehow malfunctioned. On right-clicking and selecting properties, I saw

This device is not configured correctly.
(Code 1)
A service installation section in this INF is invalid.
To find a driver for this device, click Update Drive.

So I decided to find a lasting solution. Today I will show you how to fix MTP USB Device Driver not configured correctly.


Method To Fix MTP USB Device Driver (USB Device not configured correctly)

To fix MTP USB device driver ( USB Device Not Configured Correctly), You simply need to install the Media Transfer Protocol Porting Kit Download MTP and
Media Feature Pack for N and KN versions of:
Windows
for Windows 7 here,
Windows 8 ,
Windows 8.1 or
Windows 10 here

It depends on which your PC is running on. Also, ensure to download the 32 or 64 bit version depending on which your PC is running on.

How To Know If A PC Is A 32 or 64 Bit PC?

To check If A PC Is A 32 or 64 Bit PC, right-click "My Computer" (or This PC) and "select Properties". You'll find it in front of "System Type".

All Credita Goes To Team Damtops 

Tuesday, August 23, 2016

Nougat Android 7.0 Now Rolling Out, Hope Your's Among?

At long last, Google has begun the rollout of Android 7.0 Nougat to upheld gadgets. The gadgets are the Huawei Nexus 6P, LG Nexus 5X, Motorola Nexus 6, HTC Nexus 9, Asus Nexus Player, Google Pixel C,
and General Mobile 4G. Is your gadget among?

It is just around a month after the last Android 7.0 Developer Preview was made accessible, staying with Google's timetable.

More often than not, Android framework redesigns takes some days or even weeks to get to every bolstered gadget, so the rollout of Android 7.0 ought to take weeks to go round, so unwind if your
beautiful Nexus isn't demonstrating an overhaul notice in the following ten minutes.


Gadgets that are presently running the Developer Preview will be upgraded as well too Quick Glance Of Some Features Of Android 7.0 Nougat OS

=> Expanded emoji
=> Customizable Quick Settings in Android 7.0 Nougat
=> It brings with it the ability to set multiple locales and languages, 72 new emoji, multi-window functionality,
=> Ability to quickly switch to the previous app (by double-tapping the multitasking button),
=> It brings the Vulkan graphics API,
=> Newly dedicated VR mode,
=> Doze on the Go for even better battery life when you're on the move, custom Quick Settings,
=> Direct replies from notifications, bundled notifications,
=> A built-in mobile data saver,
=> file-based encryption, and much more.

Android 7.0 Nougat is the way forward and a lot of Nexus devices are ready set to run it.